
First off, sorry for the long delay folks!
It's been quite a hectic past few days for me, but now we're back on track!
For starters the Jam's deadline has been forwarded to 30th of March. So be ready to get a flood of updates in the next 2 days. This will be a 48 hours sculpt project, so it'll be finished around Sunday evening Jakarta time. I hope you've checked the Tutorial/guides posts earlier, since I'm not going to go into details in some areas (if at all).
Lets get part 1 started!
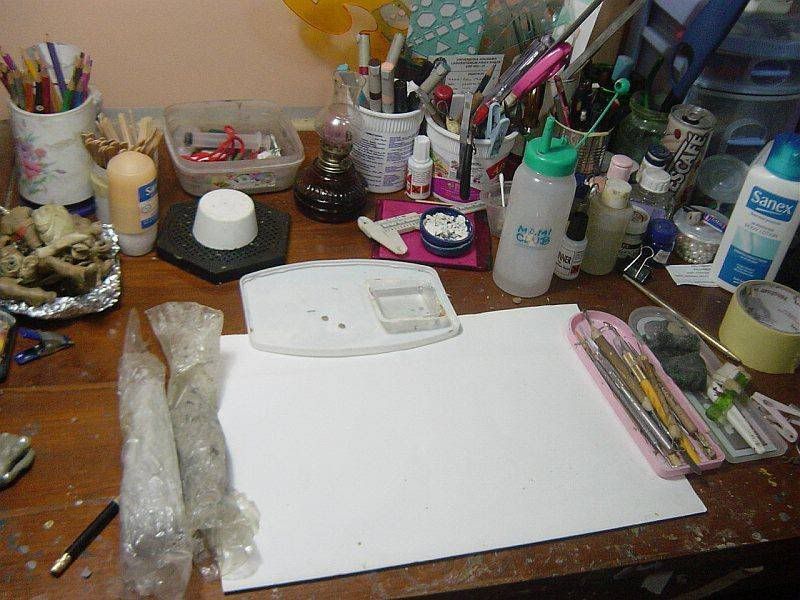
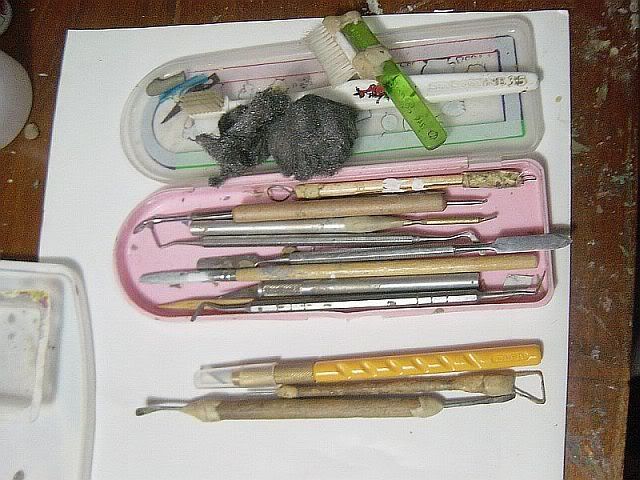
Preparation is important. So for this project I tidied up my work space a bit. Behold my messy work table! The next picture shows the tools that I use when sculpting. Most of them are dental tools and handmade tools. Sorry for the blurry picture. If you need to see the tools more clearly or wondering what some of them are used for, just give me a shout in the box to the right.
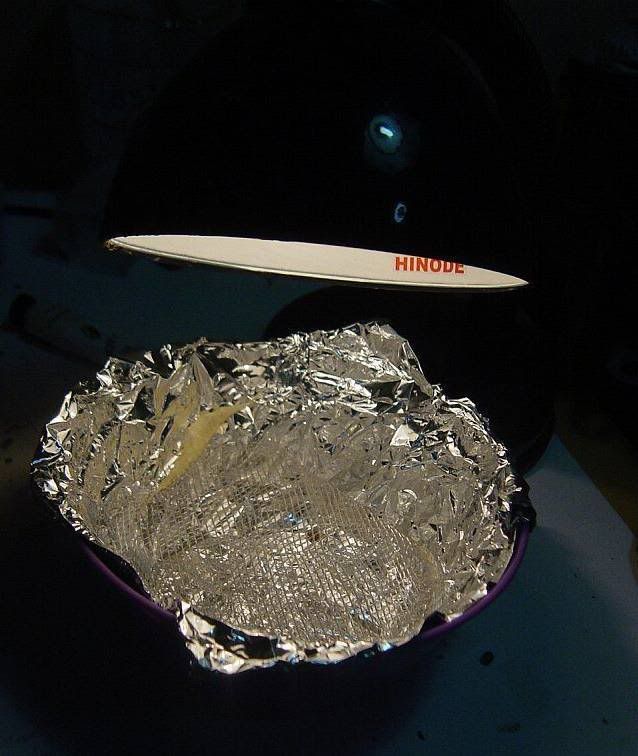
One more thing that I need for this project is an oven/dryer to dry (DUH!) the clay. For this I use a plastic bowl lined with aluminum foil. I placed a wire mesh at the bottom of the bowl to make a platform. For the heat source I use a regular desk lamp with a 25 watt bulb. You could go for more wattage, but this will do.


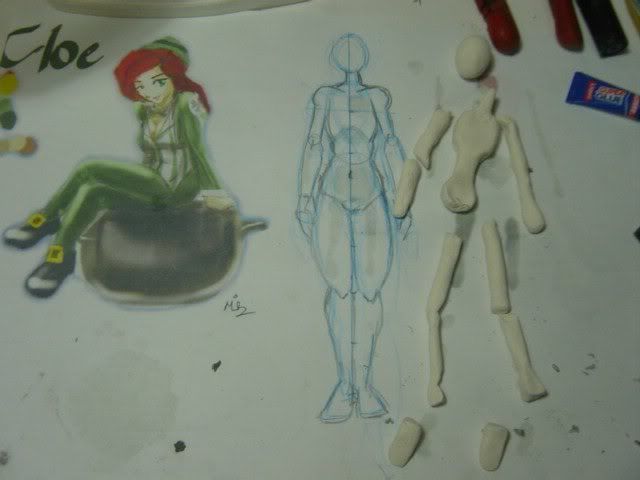
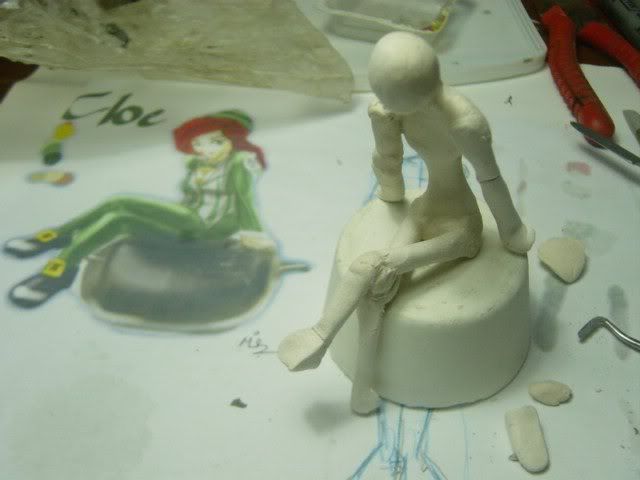
I've designed a simple character for this project. I named her Cloe. As you can see, my drawing skills need major improvement -_-u. She'll be sculpted using LaDoll clay with no armature inside. The underlaying structure will be made from the same material so that it'll be easier to cut apart later (no cutting into wires and the such). I've drawn a base figure to help me make the limbs proportional. The figure height is 16 cm, so this figure will be about 1/10 scale. The limbs, body and head are then set aside to dry.
The limbs are then cut apart and arranged to replicate the pose as seen in the concept sketch. Wet clay was used to weld the limbs together. You really need to blend the clay to get a good adhesion. After the pose has been established , the whole figure was put aside to dry in the mini dryer/oven.


Thats the end of part One. Make sure to check back soon for part 2.
Thanks for visiting!
It's been quite a hectic past few days for me, but now we're back on track!
For starters the Jam's deadline has been forwarded to 30th of March. So be ready to get a flood of updates in the next 2 days. This will be a 48 hours sculpt project, so it'll be finished around Sunday evening Jakarta time. I hope you've checked the Tutorial/guides posts earlier, since I'm not going to go into details in some areas (if at all).
Lets get part 1 started!
Preparation is important. So for this project I tidied up my work space a bit. Behold my messy work table! The next picture shows the tools that I use when sculpting. Most of them are dental tools and handmade tools. Sorry for the blurry picture. If you need to see the tools more clearly or wondering what some of them are used for, just give me a shout in the box to the right.
One more thing that I need for this project is an oven/dryer to dry (DUH!) the clay. For this I use a plastic bowl lined with aluminum foil. I placed a wire mesh at the bottom of the bowl to make a platform. For the heat source I use a regular desk lamp with a 25 watt bulb. You could go for more wattage, but this will do.
I've designed a simple character for this project. I named her Cloe. As you can see, my drawing skills need major improvement -_-u. She'll be sculpted using LaDoll clay with no armature inside. The underlaying structure will be made from the same material so that it'll be easier to cut apart later (no cutting into wires and the such). I've drawn a base figure to help me make the limbs proportional. The figure height is 16 cm, so this figure will be about 1/10 scale. The limbs, body and head are then set aside to dry.
The limbs are then cut apart and arranged to replicate the pose as seen in the concept sketch. Wet clay was used to weld the limbs together. You really need to blend the clay to get a good adhesion. After the pose has been established , the whole figure was put aside to dry in the mini dryer/oven.


Thats the end of part One. Make sure to check back soon for part 2.
Thanks for visiting!
2 comments:
hey I wanted to ask you something
I'm gonna do a figure with modelling material that is air-hardening, should I let it dry after everystep like you did? will it stuck if I use some of it on top of the already hardened material? maybe you know...
hi ansnnn,
For air hardening material, such as paper clay, you should do it in layers. You build up little by little and do details last.
The new material should adhere to the old harden material well. You might need to roughen the surface of the harden layer to give it grip for the new material.
Hope this answers your question.
Cheers!
-midz
Post a Comment